
Setup Form Alerts
Alerts help your practice automatically flag patient submissions that need attention and notify the appropriate team members by email. When a patient’s response matches criteria you define, Zentake highlights the question on the submitted form and sends an email notification to the recipients you choose.
This guide explains how to create alerts and how alert indicators appear throughout Zentake.
Creating an Alert
Accessing Alerts
Open any form in the Form Builder and click the Settings tab at the top of the page. In the left sidebar, select Alerts.
Here you’ll see:
- A list of existing alerts for the form
- Alert status (enabled or disabled)
- A New Alert button for creating additional alerts
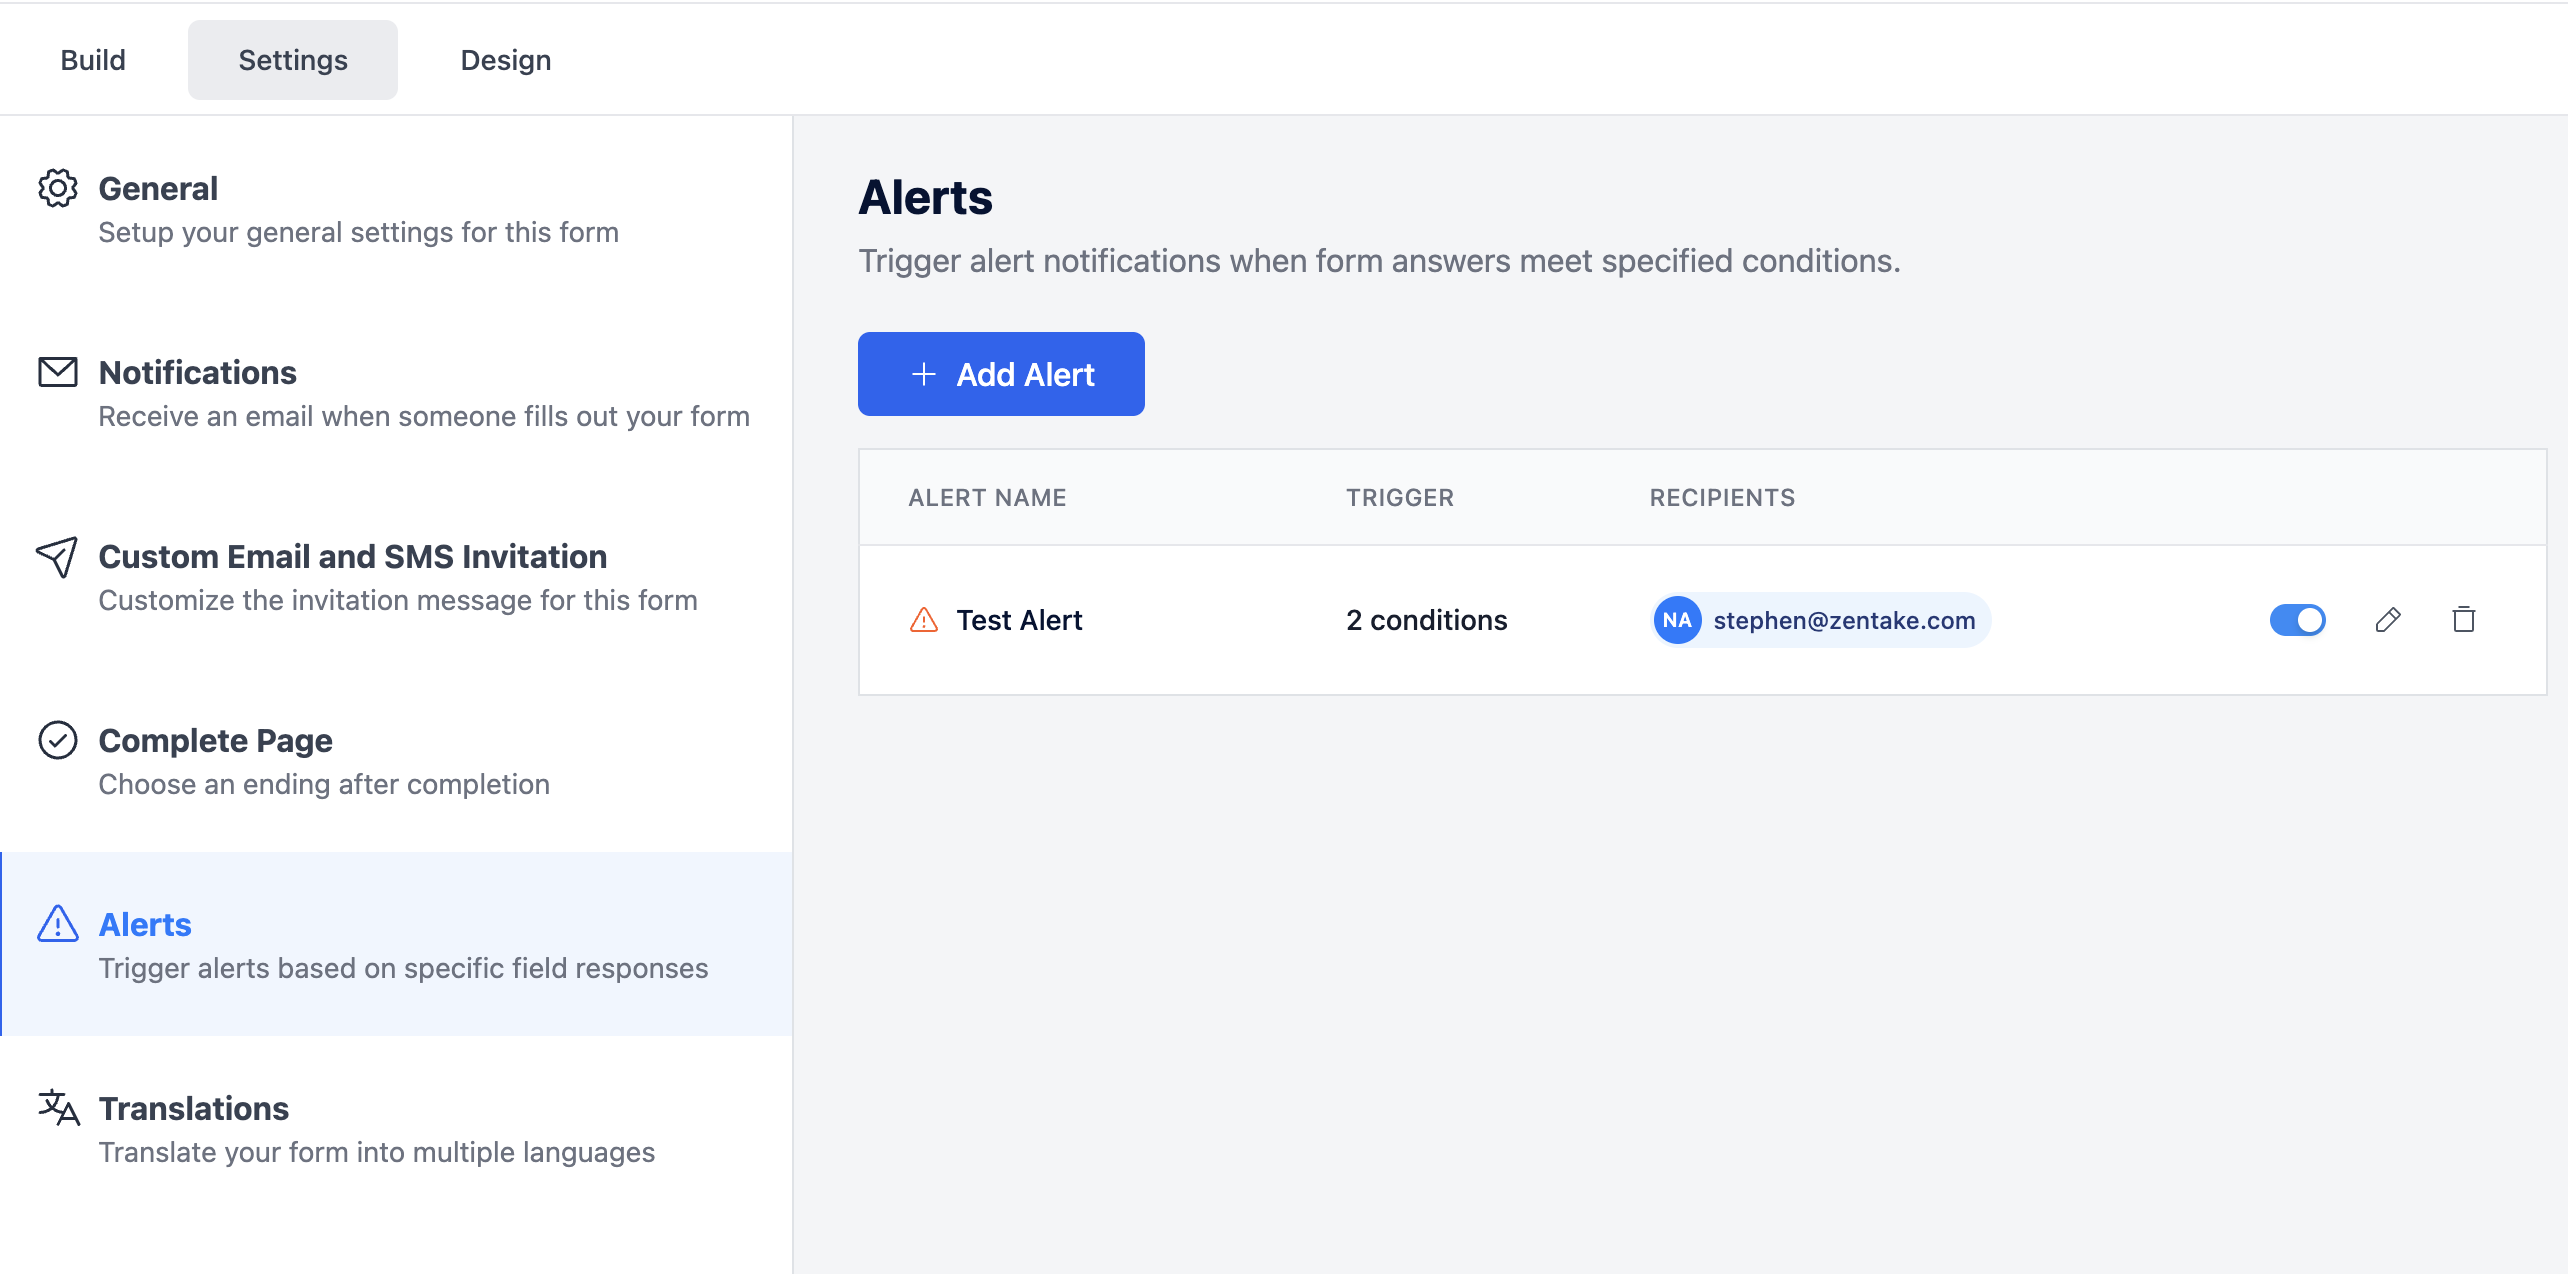
Click New Alert to open the alert editor.
Each alert includes the following settings:
-
Alert Name
The alert name is used internally by your team.
Choose a name that clearly describes the purpose of the alert.
Examples:
- Suicidal Ideation Flag
- Allergy to Contrast Dye
- Insurance Verification Needed
-
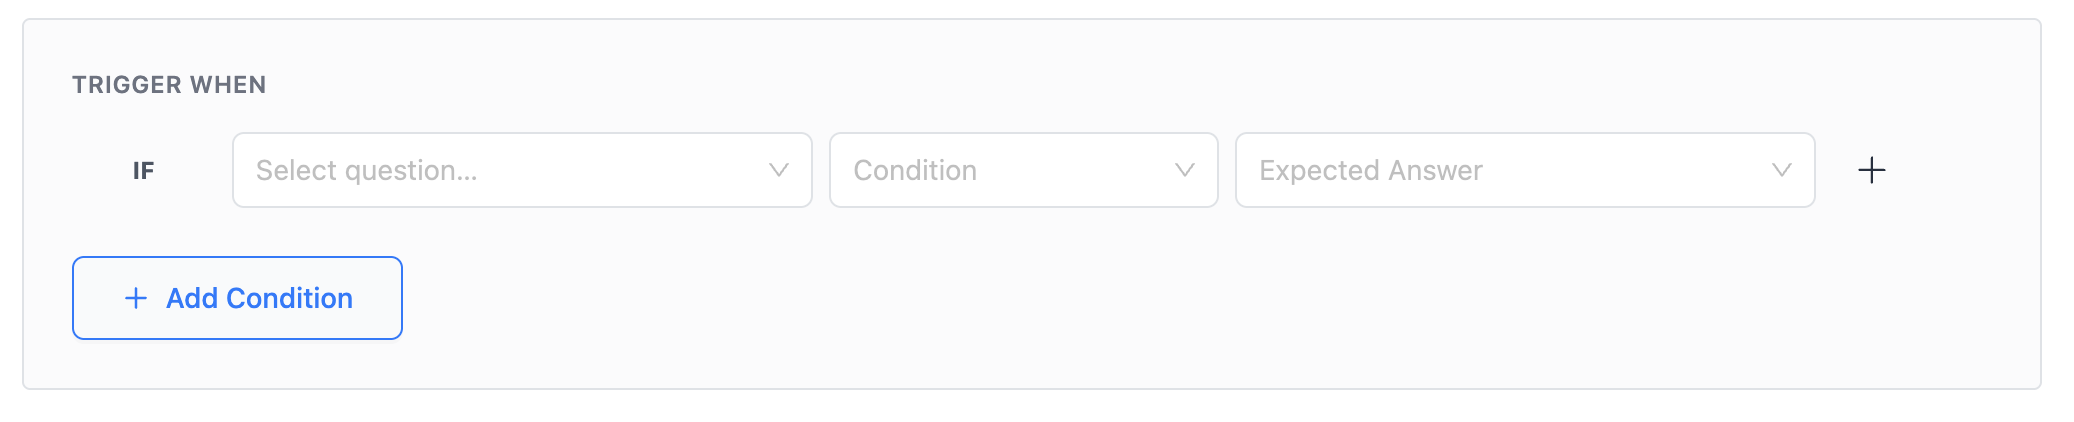
Trigger Conditions
Trigger conditions determine when an alert is activated.
Each condition follows this logic structure:
IF [question] [operator] [expected answer]
Example:
- IF “Have you had thoughts of self-harm?” equals “Yes”
-
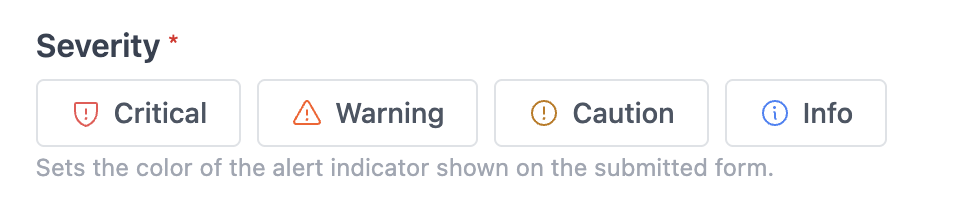
Severity Levels
Severity controls the color and icon displayed on the Dashboard in Zentake. Severity does not change how alerts behave, but it helps staff prioritize submissions more quickly.
-
Alert Label
The alert label appears on the dashboard when you hover over the Severity Icon/
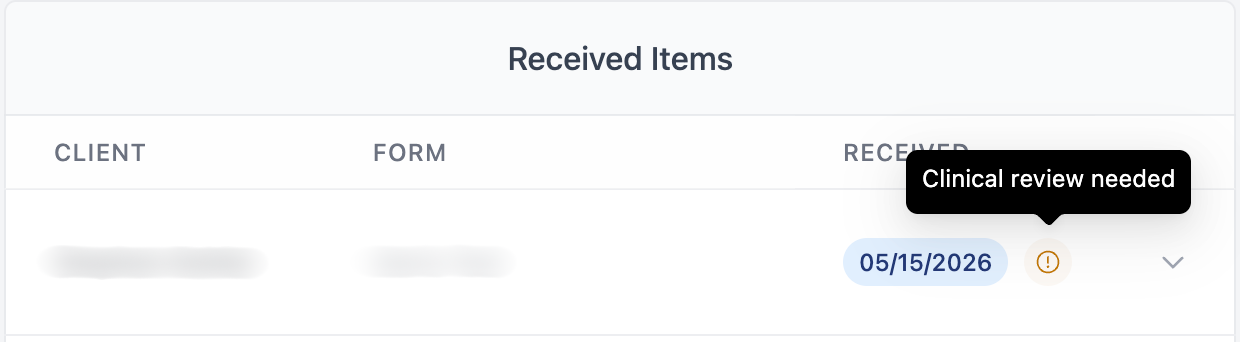
Keep labels short and actionable.
Examples:
- Clinical review needed
- Allergy flag
- Billing review
Recipients
Choose who should receive email notifications when the alert is triggered.
You can send alerts to:
Email Content
Customize the email subject line and message body sent when the alert fires.
Each alert email automatically includes a direct link to the submission in Zentake.